News
| <<< Prev article |
January - February 2006 |
Next article >>> |
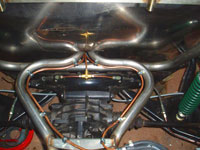
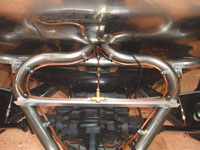
 The brakes are all now finished. This however was only after three attempts. I mistakenly assumed that the rear subframe was a rigid part of the car. It isn't.
This was pointed out to me by some guys on the RHOCaR site and (in hindsight) I'm grateful as potentially, this could have caused concern at SVA time.
I'd originally mounted the copper pipes on the rear subframe and ultimately (as its rubber mounted) this could have led to brake pipe fracture.
Anyway, it's all OK now.

On a completely separate tack, I suddenly decided that the Ignition coil was mounted incorrectly (on its side rather than upright). To fix this, I had to secure some angle to the round tube in the engine bay in order to get something flat to bolt to - This is now done.
My attention was then drawn to finishing off the handbrake. This has now been positioned where I want it and seems to work fine. This is the lever arrangement and this is how it's all set up underneath the car. All metalwork is still to be painted of course!
I've made a good start at completing the rear bulkhead panel with regards to filling in all the gaps. There's still a bit more to do though.
I've been down to Robin Hood Engineering and bought a new set of GRP in green with the wider cycle wing option. I also bought the wider rear stainless rear wings. I had a bit of an issue with the bonnet. As I've stated before, there was a nasty scratch on one of the bonnet halves so I purchased a replacement. I'm not going to go into too much detail here but suffice to say that when I got the new one home, I discovered that it didn't match the other half! This was despite being assured that it would be the same. I therefore had to take another trip down to RHE to get it sorted. It transpires that the equipment that RHE use to make these panels changed in 2002 and any panels produced before this are slightly different. The only option was to buy another half but this was just getting ridiculous. After inspecting the scratched panel, RHE have advised me that with some fine wet & dry and some polishing, I should be able to get this scratch out - I'm not filled with confidence, so I'll keep you posted.
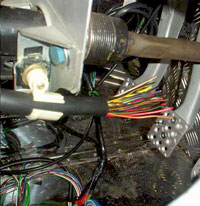
Thoughts are now turning to the dreaded electrics. The first thing I realised was that I didn't have the connectors for the column stalks. A trip down to my local scrapyard soon got this sorted. I've no idea how many relays I'm going to need, how many fuses etc and I'm sure that I've still got a few more electrical bits to source yet. Anyway, now that I've roughly laid out the Vicky Green Loom, I'm all set to solder!

Before doing anything with the electrics though, I thought it'd be best to finish off the fuel filler neck. I'd then have a sealed fuel system, protected from any stray sparks (which I thought would be a good idea). The filler neck that's supplied in the kit was completely wrong with regards to the angle. The only option was to cut a piece out of the middle and connect them back together with some flexible fuel pipe. Although I'd managed to source some pipe, it wasn't very flexible at all for the bend that I needed. Another option was to cut & shut the original pipe and weld it all back up again. Getting the required angle right though has been a complete nightmare. I've also spent some time with the Aero Filler Cap. The laser cut-out in the rear panel is slightly too big, leaving gaps around the outside. They're very small but visible nonetheless. I've fabricated an aluminium ring to: A - Cover the gaps and B - step the Aero Cap's protrusion down somewhat. Otherwise, I gather that this can also be considered a 'sharp edge' and therefore a no-no for SVA. Nearly there now though - Pics to follow in the next update.
Fortunately, the Royal Mail decided to pay out with regards to the new seat that got damaged in transit - Phew! There's a replacement seat now on its way. So with the brakes done and the car having its own fuel supply, it seemed only right to have a little test drive. This is the first time that the car has moved under its own power. The engine sounds sweet, the brakes work and it steers too! I've still a long way to go with the build, but driving the car up and down the drive was absolutely fantastic!
Steve...
| <<< Prev article | Next article >>> |
News Archive
Select an article from the list and click below to view


