News
| <<< Prev article |
November / December 2005 |
Next article >>> |
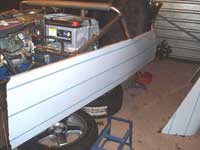
 It was time to fit the left hand side panel. I'd been putting this off because I'd heard all the horror stories about kinking the panel during fitting.
I found some very clear and concise instructions on the North West Hoodies web site (Thanks Guys) so I printed them off and asked my friend John to help me with this.
We set to, following the instructions pretty much to the letter and after a few hours the panel was on and we were pleased with the result.
Also, relieved - No kinks!
The next job was the nearside infill panel. With the suspension off, this was fairly straightforward. Again, it was a pretty painless exercise and confidence is running high.
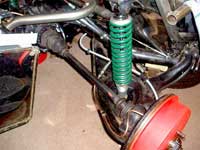
With the fuel lines installed, it was then time to think about running the brake pipes. This was done quite easily along the left hand tunnel wall and I then continued to install the brake pipes out to the rear wheels. Whilst doing this job, I also installed (or partly installed) the handbrake cable. This was once I'd found out how to get the brake drums off. They were stuck fast! It turned out that I wasn't hitting them in the right place, or anywhere near hard enough (Thanks to the RHOCaR Community!). The inner cable is going to be too long so I canvassed the RHOCaR members yet again. Plenty of advice (Thanks again Guys) so I've got some ideas as to what to do about this. For now though, the cable's just looped up tidily until I get around to fitting the handbrake lever. The Robin Hood intended mounting point was a concern to me. Apparently, some SVA testers don't like the lever mounted on the floor as in their opinion it's difficult to reach. I can't say I like this either. Some builders have fitted the lever onto the tunnel top. I'm not sure I fancy this method as I feel it may be a bit cumbersome. I was speaking to Klaxon at Donnington in October, who'd came up with an idea of mounting the lever on a plate half way up the tunnel wall side and fabricating a linkage down to the cable. I quite like this idea, so I think I'm going to have a go at this method too. There'll be pics of this later once I've figured out what I'm doing! ;)

I intend to run the electrics along the top of the tunnel in the groove formed by the two tubes so, with all the lines laid in the tunnel, it was time to finish off the remaining tunnel side and so that's all now done. This then allowed me to finish off the rear bulkhead panel. Next up in this area will be to fill in the gaps between the bulkhead and the side panels. This will be another exercise involving making up pieces of stainless from cardboard templates.
Although the rear panel is still to be refitted, I've finished off the fuel tank, flushed it out and connected up the pipes. Now, when I occasionally start the engine, at least it'll have its own fuel supply rather than drawing fuel out of a finely balanced can by the side of the car!
I've finally decided to ditch the Recarro seats and splashed out on a pair of Cobra Clubmans. The episode though has been a bit of a nightmare. Unfortunately, one of them got damaged in the post so I'm currently trying to get this issue resolved. Apart from that though, I'm really pleased with them and they look great.
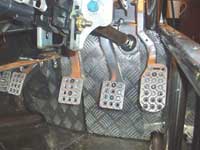
 I'd noticed that the throttle pedal was a tad too close to the brake pedal. A bit of cut & shut was required.
I can't weld for toffee, but I know a man who can - Thanks John! Also, I'd bought some fancy alternatives to Fords pedal rubbers.
Not essential I know, but I thought they'd look pretty good - and in my opinion, they do.
What with some Family commitments mid November, followed by some horrendous PC problems and then Christmas, I haven't managed to make quite as much progress as I'd have liked but at least I seem to be now steadily going in the right direction. Roll on 2006 - Happy New Year!
PS. I've noticed lately, quite a few people getting rather twitchy with regards to what's involved in order to pass the SVA. A joy yet to behold for me by the way. A colleague at work has quite a bit of experience when it comes to kitcars and yesterday lent me a book (or rather a magazine) dating back to 1998. I know it's from a while ago but I don't think it's any less relevant. It tries, I believe, to put the SVA requirements into layman terms. Along with Longboarder's very useful find (which is in more depth and more up to date), I think they compliment each other quite well:
• SVA Guide (PDF Format)
• SVA Manual (PDF Format)
Steve...
| <<< Prev article | Next article >>> |
News Archive
Select an article from the list and click below to view


