News
| <<< Prev article |
September / October 2005 |
Next article >>> |
When the guys came over on the Saturday evening during the Harrogate Show weekend, I learned that the front cycle wings that I have are too narrow.
Apparently there are two widths for these wings (8 inch & 9 inch). I have the wide tyres and the narrow wings. I'm not sure what's gone on here.
Either the original purchaser bought the wrong stuff or RHE supplied the wrong stuff.
Robin Hood Engineering won’t exchange. Whatever, it looks like I’m going to have to dig into my pocket.
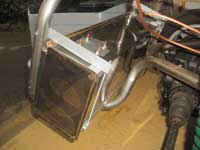
 I finished off the Fuel Tank. I had about three attempts at this before I was happy that it was secure enough.
Plan A consisted of some metal brackets sandwiching the forward
upper lips.
This seemed fine initially but then I realised that the threaded rods were putting undue strain on the tank and bending them out.
Plan B involved the standard system of strapping but I just couldn’t seem to get them tight enough.
Plan C was to fabricate some angle iron across the top of the tank on each side and then use the
threaded rods to clamp it all down. I’m happy with this now.
I’ve been thinking about the GRP situation. It’s red. It’s not that I don’t like red but I really wanted green. When you buy a part built kit though, you don’t always get everything you want eh? I’ve punted around and for the cost of getting it all sprayed, I might as well buy a complete new set in the colour I want! Being as the front wings are too narrow anyway, I’ve put the whole 5-piece set on the RHoCAR website to see if I can at least get something back. No joy in selling it as yet and I keep putting off going down to Robin Hood Engineering. I guess I’ll have to sooner or later though.
I’ve cut down the seats further. They were just too high with only the runners removed. Basically by removing as much metal as possible from their sub-frames and then making up some anchorage straps from 1 inch bar 3mm thick. Along with this I’ve sorted out the seatbelt anchorage mounting points. Now that I’ve cut down the seats there are no longer any inner anchorage points. Being as the tunnel walls had already been fitted, I had to remove them in order to fit some fabricated bracketry on the floor within the tunnel void. The outer points are as provided by Robin Hood. Again, 7/16th UNF nuts used and this time welded onto small plates and secured to the chassis to enable one-handed removal for SVA. Despite all the work in cutting the seats down however, I’m still not happy with them. I want to sit even lower and more importantly, further back. I’ve got my eye on a pair of Cobra Clubmans (wow, more expense). However, I think these will look and suit a lot better.
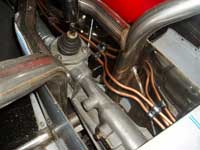
 Next up was to start laying the fuel lines. I’ve used 8mm copper for the feed and 6mm copper for the return.
With the left-hand tunnel side re-fitted I then had something to secure the lines to.
This was quite tricky though, with long lengths of pipe waving about all over the place and not wanting to go where I wanted at all!
I won in the end though and I’m pleased with the outcome.
This is a picture of the lines in the engine bay,
this, the tunnel and
this, the boot area. All I need to do now is to fit the sender unit.
I’m leaving this for now though as I’ll need to swill the tank out and I’m not ready to fit the filler pipe yet.
Now that the fuel lines are in, it was time to refit the rear bulkhead panel. I’d removed this to help me fit the fuel lines. Once this was back in place, I set to covering up some of the gaps. This isn’t finished yet but it’s coming along quite well.
I’m starting to get quite a few jobs on the go all at once. This is good though because if you get stuck on something, you can simply pick up with another aspect of the build while you’re subconsciously thinking about the previous task.
The next thing to get my attention was the off-side infill panel. Again this had been already fitted but wasn’t finished. To work on this, all the suspension has to come off. It’s not a daunting as it sounds actually so, within a short while, it was all scattered about on the floor. I could then set about finishing off the panel properly. Actually all I had to do was to put a fold along the bottom and trim a few bits and then it was ready to all go back on (hopefully for good!). For SVA, I’m going to need some adequate covering for the track control arms but again, I’m leaving this for now.
I went to the Donnington Show mid October which was well attended. I Bought some more bits and spoke to quite a few people (sorry I’m useless with names) but thanks guys for yet another deluge of informative hints & tips.
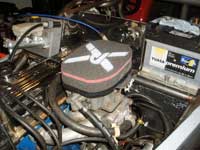
 One of the things I collected at Donnington was a Pipercross slim air filter.
This is now fitted and I reckon the bonnet will now clear. Well here’s a sad story. I placed the bonnet halves in position and yep they cleared OK.
What I did notice though was a cut in the plastic covering. Closer investigation revealed a scratch, a large deep one too! Beggar I thought (or something along those lines).
I can’t live with it, so I’m going to have to get another bonnet half.
What with this and the discovery that the stainless rear wing panels are also of the narrow variety (and I need the wider ones) and replacing all my GRP,
Robin Hood Engineering are going to do quite well out of me soon. Up until this point I was keeping pretty well to my budget.
Soon though, it’s going to be taking quite a bashing. C’est la vie. If the jobs worth doing, it’s worth doing well, or so they say!
I don’t want to finish on a negative though. Despite all the headaches recently, the build is going well, albeit slowly. I’m gaining in knowledge, experience and confidence along the way and generally enjoying every minute of it all. I’m still aiming for a summer 2006 completion date but most importantly, I’m not rushing.
 I finished off the Fuel Tank. I had about three attempts at this before I was happy that it was secure enough.
Plan A consisted of some metal brackets sandwiching the forward
upper lips.
This seemed fine initially but then I realised that the threaded rods were putting undue strain on the tank and bending them out.
Plan B involved the standard system of strapping but I just couldn’t seem to get them tight enough.
Plan C was to fabricate some angle iron across the top of the tank on each side and then use the
threaded rods to clamp it all down. I’m happy with this now.
I’ve been thinking about the GRP situation. It’s red. It’s not that I don’t like red but I really wanted green. When you buy a part built kit though, you don’t always get everything you want eh? I’ve punted around and for the cost of getting it all sprayed, I might as well buy a complete new set in the colour I want! Being as the front wings are too narrow anyway, I’ve put the whole 5-piece set on the RHoCAR website to see if I can at least get something back. No joy in selling it as yet and I keep putting off going down to Robin Hood Engineering. I guess I’ll have to sooner or later though.
I’ve cut down the seats further. They were just too high with only the runners removed. Basically by removing as much metal as possible from their sub-frames and then making up some anchorage straps from 1 inch bar 3mm thick. Along with this I’ve sorted out the seatbelt anchorage mounting points. Now that I’ve cut down the seats there are no longer any inner anchorage points. Being as the tunnel walls had already been fitted, I had to remove them in order to fit some fabricated bracketry on the floor within the tunnel void. The outer points are as provided by Robin Hood. Again, 7/16th UNF nuts used and this time welded onto small plates and secured to the chassis to enable one-handed removal for SVA. Despite all the work in cutting the seats down however, I’m still not happy with them. I want to sit even lower and more importantly, further back. I’ve got my eye on a pair of Cobra Clubmans (wow, more expense). However, I think these will look and suit a lot better.
 Next up was to start laying the fuel lines. I’ve used 8mm copper for the feed and 6mm copper for the return.
With the left-hand tunnel side re-fitted I then had something to secure the lines to.
This was quite tricky though, with long lengths of pipe waving about all over the place and not wanting to go where I wanted at all!
I won in the end though and I’m pleased with the outcome.
This is a picture of the lines in the engine bay,
this, the tunnel and
this, the boot area. All I need to do now is to fit the sender unit.
I’m leaving this for now though as I’ll need to swill the tank out and I’m not ready to fit the filler pipe yet.
Now that the fuel lines are in, it was time to refit the rear bulkhead panel. I’d removed this to help me fit the fuel lines. Once this was back in place, I set to covering up some of the gaps. This isn’t finished yet but it’s coming along quite well.
I’m starting to get quite a few jobs on the go all at once. This is good though because if you get stuck on something, you can simply pick up with another aspect of the build while you’re subconsciously thinking about the previous task.
The next thing to get my attention was the off-side infill panel. Again this had been already fitted but wasn’t finished. To work on this, all the suspension has to come off. It’s not a daunting as it sounds actually so, within a short while, it was all scattered about on the floor. I could then set about finishing off the panel properly. Actually all I had to do was to put a fold along the bottom and trim a few bits and then it was ready to all go back on (hopefully for good!). For SVA, I’m going to need some adequate covering for the track control arms but again, I’m leaving this for now.
I went to the Donnington Show mid October which was well attended. I Bought some more bits and spoke to quite a few people (sorry I’m useless with names) but thanks guys for yet another deluge of informative hints & tips.
 One of the things I collected at Donnington was a Pipercross slim air filter.
This is now fitted and I reckon the bonnet will now clear. Well here’s a sad story. I placed the bonnet halves in position and yep they cleared OK.
What I did notice though was a cut in the plastic covering. Closer investigation revealed a scratch, a large deep one too! Beggar I thought (or something along those lines).
I can’t live with it, so I’m going to have to get another bonnet half.
What with this and the discovery that the stainless rear wing panels are also of the narrow variety (and I need the wider ones) and replacing all my GRP,
Robin Hood Engineering are going to do quite well out of me soon. Up until this point I was keeping pretty well to my budget.
Soon though, it’s going to be taking quite a bashing. C’est la vie. If the jobs worth doing, it’s worth doing well, or so they say!
I don’t want to finish on a negative though. Despite all the headaches recently, the build is going well, albeit slowly. I’m gaining in knowledge, experience and confidence along the way and generally enjoying every minute of it all. I’m still aiming for a summer 2006 completion date but most importantly, I’m not rushing.
Steve...
| <<< Prev article | Next article >>> |
News Archive
Select an article from the list and click below to view


